4.9 1890+ Google Reviews
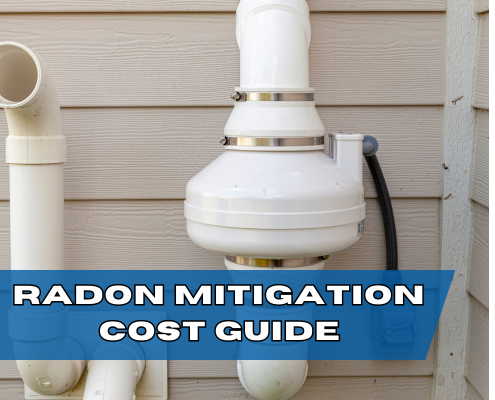
The average cost of a fully installed radon mitigation system is around $2100. However, crawl spaces are much more expensive, so if you remove them from the equation, the average cost is about $1750.
Remember to adjust for the cost of living in your area. For example, average prices in California are much higher.
Also, these averages are based on running your pipes outside along the exterior of your house. Not surprisingly, some people prefer to conceal these pipes indoors. Likewise, the price increases substantially as much more labor and planning is involved. Finally, these costs were based on a 2000 sq ft simple home. If your home is bigger and nicer, the prices go up.
The cheapest scenario for a radon reduction system is a single-story home on a slab foundation. There are much less materials and labor involved. You can expect to pay around $1600 for a home like this.
Once you add a basement, the costs go up a little. You’ll need more materials and labor, bringing you to about $1750.
Continuing up, your radon mitigation costs for a story home on a basement foundation will be around $1950
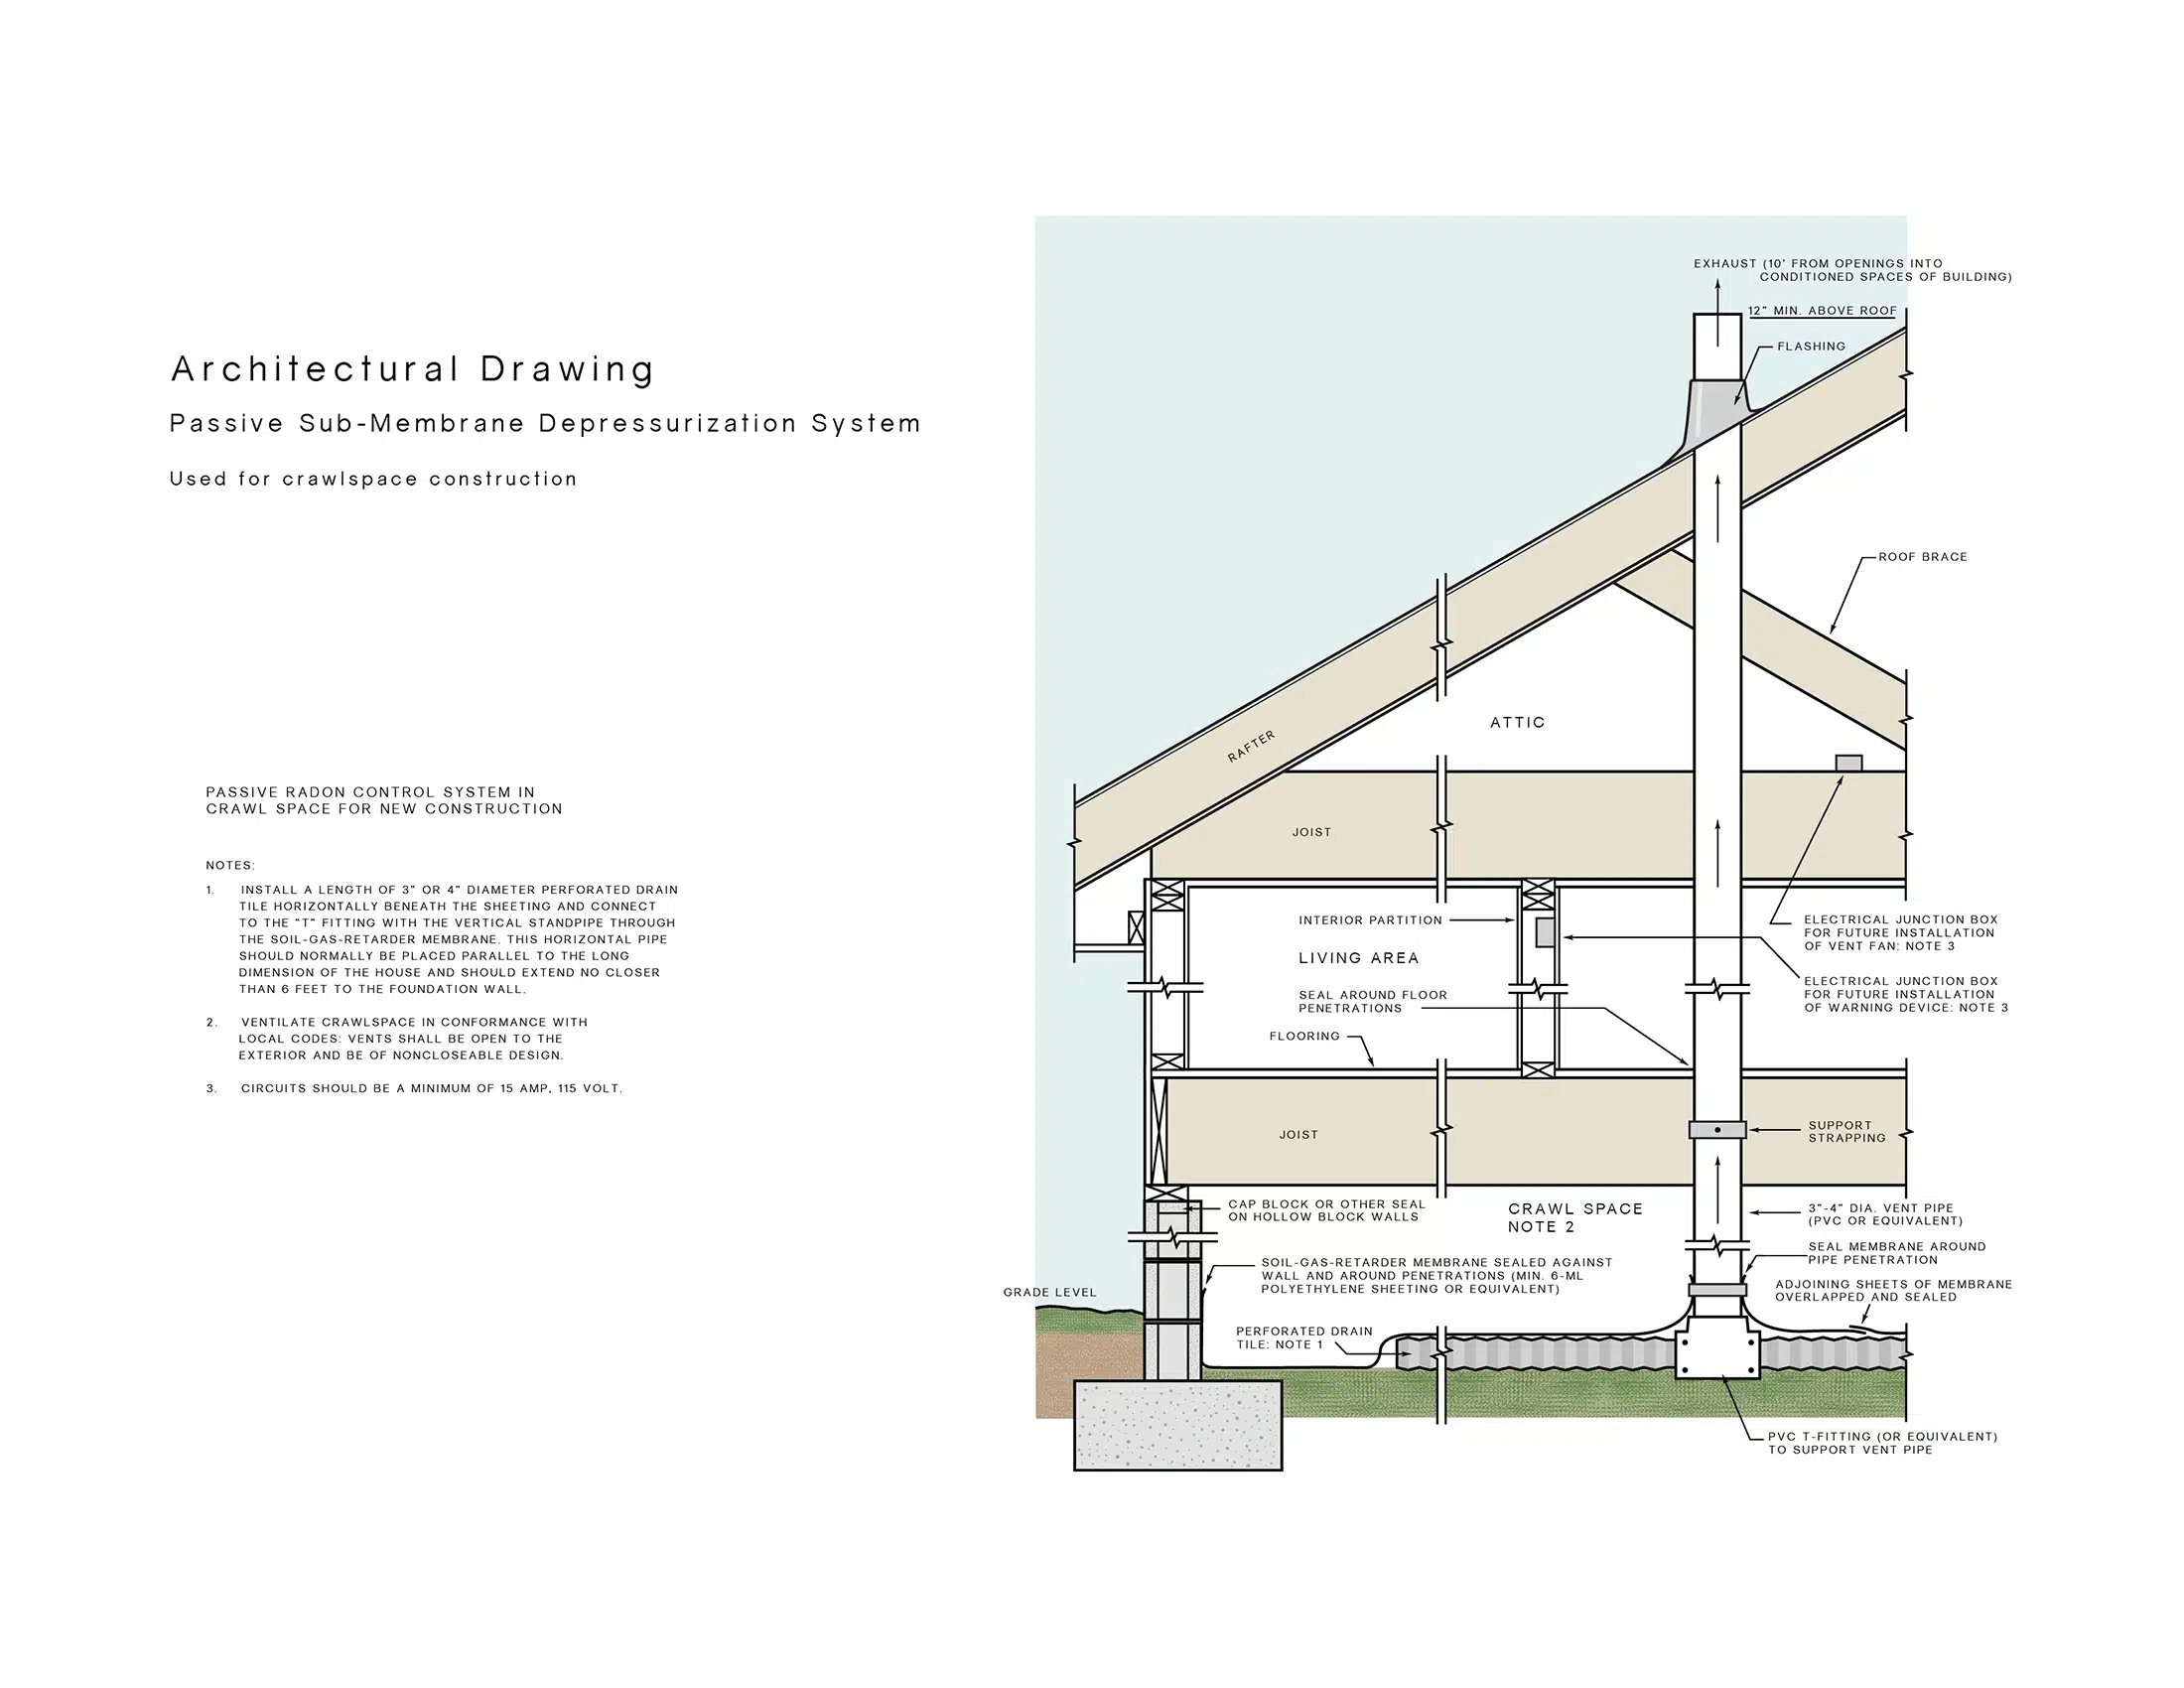
Crawlspaces require the most expensive radon mitigation systems. The additional costs make sense once you understand the basics of a sub-membrane depressurization system. The average cost for a radon mitigation system for a house in a crawlspace is around $2800.
Very simply, a radon mitigation system is similar to your bathroom fan. Just like your bathroom fan pulls moisture and odors from your bathroom and exhausts them outdoors, a radon fan pulls air from beneath your home and exhausts it outdoors.
The difference is that a radon fan continuously runs (24/7) to keep the radon levels in the living space low.
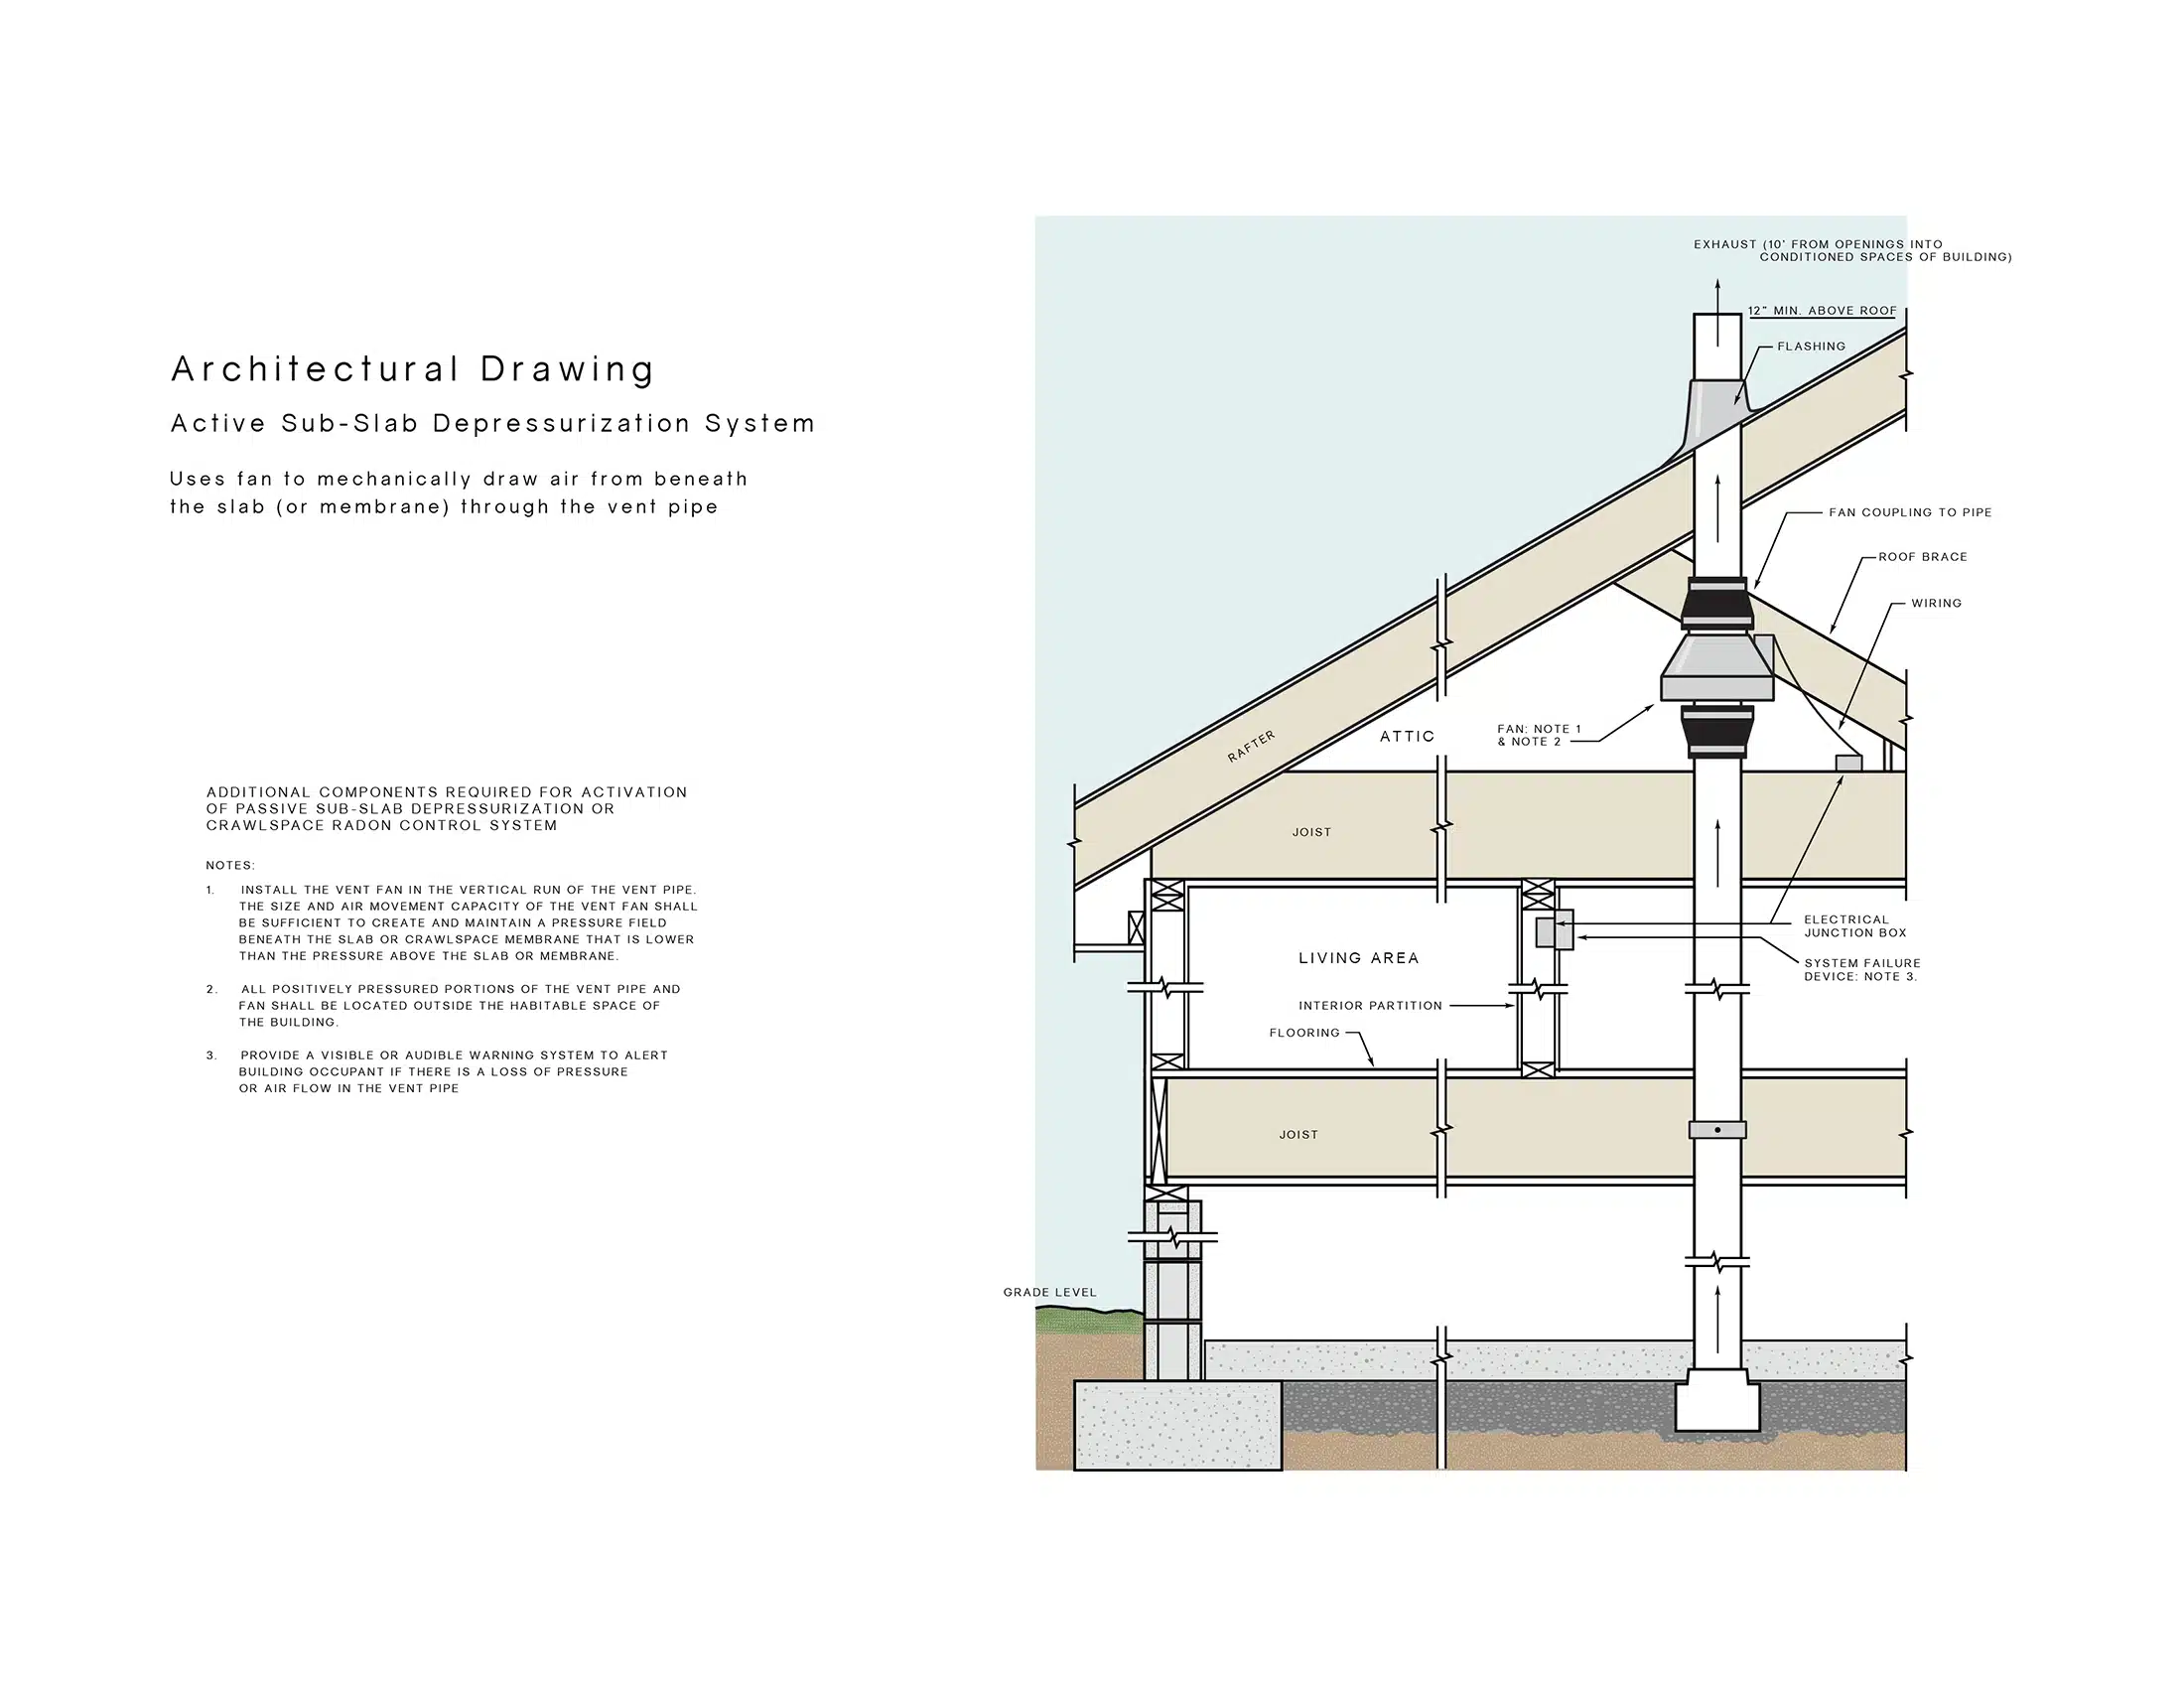
We use two primary types of radon mitigation systems in Virginia – sub-slab and sub-membrane depressurization systems.
The theory behind radon mitigation revolves around constantly removing the air from under the home and exhausting it outdoors. Both sub-slab and sub-membrane systems include a radon fan and PVC pipe. However, as their name suggests, the PVC pipe goes through the basement concrete slab (the floor) in a sub-slab system. Meanwhile, with a sub-membrane system, contractors create an airtight sealed membrane with plastic sheeting and permanent Tape. Then, they use the fan system and drain tile to extract the air beneath the membrane.
Seeing the steps involved will help you feel comfortable choosing a more expensive and quality company.
Your contractors need to design and plan the system first. Figuring out the best placement and taking measurements could take up to an hour.
Once a spot is chosen, some test holes get drilled through the concrete floor. Next, they’ll place a fan over one hole and release test smoke over another hole. They’re looking to see that the smoke gets pulled into the hole, indicating good airflow. This type of testing also confirms if more than one fan is needed. Larger homes may require multiple fans to lower the indoor radon level.
Sealing gaps and cracks in the basement floor/walls helps to stop radon gas entry through the home’s foundation and exterior walls. Plus, it minimizes interior air getting drawn into the radon mitigation system. Expansion joints, cracks, openings around penetrations, and sump pumps allow radon gas into the home.
However, most professionals agree that sealing alone will not mitigate high radon levels. Making any type of foundation airtight is nearly impossible, so creating a negative pressure under the foundation is a more practical solution.
Your radon mitigation company needs to drill clean holes through several inches of concrete. You’ll need at least two holes – one through the basement floor and one through an exterior wall. Unfortunately, some companies use cheap tools and poor practices, resulting in large ugly holes prone to further damage. Likewise, a cheaper mitigation cost likely means a poorer quality of work.
You’ll probably need some electrical work done before the system is complete. Whether your radon mitigation contractor does it themselves, subs it out, or tells you to hire an electrician, the radon fan needs a junction box nearby.
Finally, the PVC pipes and radon fan are assembled. Then, there are the final touches, like sealing the penetrations. The exhaust pipe has to terminate above the roof to ensure the radon gas does not reenter the home.
Now that an active sub-slab depressurization system is in place, the best radon mitigation contractors perform a smoke test. This allows them to see any leaks in the system.
The final step for any radon mitigation system is third-party professional radon testing. A final radon test ensures the high levels of radon gas have been reduced. Technically, there are no safe levels, but mitigation can reduce radon levels by up to 99 percent.
Here’s a general cost breakdown for a typical radon mitigation system.
Radon Fan – $200-$400
Piping – $100-$200
Crack Sealer – $50-$100
Electrical – $300-$500
Labor – $600-$1000
Third-Party Radon Test – $200
Radon Radon -$200-$400
Drain Tile – $200-$300
12 Mil Vapor Barrier – $400-$600
Permanent Tape – $200 – $300
Pipe – $100-$150
Electrical – $300-$500
Labor – $1000-$2000
Third-Party Radon Test – $200
Various factors can increase or lower your total cost. For example, the home’s size is a significant factor, especially if it’s big enough to require two radon mitigation systems. Or, maybe your home already has a sump pit, so they won’t need to drill a hole through your floor. It’s also possible that electricity is already nearby, lowering the cost of any electrical work needed.
The amount of Radon also affects the final cost. High radon concentrations require bigger fans, which are more expensive.
The National Radon Proficiency Program (NRPP) website is the best place to find qualified radon mitigation companies. Then, you can cross-reference the mitigators in your area on your favorite review site, such as Google. Getting at least three quotes before awarding the job is best.
Radon is the second leading cause of lung cancer. Although some companies advertise radon mitigation for under $1000, our experience is that cheap systems cost more in the long run. If you have a radon problem, the best way to lower your health risk is to hire the best radon mitigation specialist in your area. It may cost double the cheapest estimate, but it’s worth it.